Archive for the ‘Roof Repair 101’ Category
Roof Tear Off
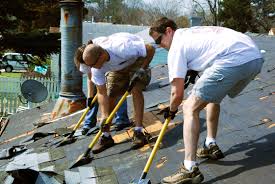
Tearing off an old roof is hard work; it is hard on your back, muscles and joints. Heavy roofing materials need to be lifted to the roof either manually or by machine. It is hard work shoveling and scraping the old shingles and nails off the roof. Steep pitched roofs can be especially dangerous, being careful not to lose your footing and falling with loose debris.
Start at the top of your roof and remove the shingles in sections standing above or behind the debris to avoid standing on it. Scrape off all the roofing with shovels, pitchforks or crowbars. Keep your shovel or pitchfork up against the decking to peel off large chunks of shingles instead of one at a time.
Remove Flashings
Remove flashings around vents, valleys, dormers, chimneys and skylight’s. Some flashing may be reusable but most will need to be replaced. Remove shingles across the ridge and pry out any nails and seep away any debris left on your roof.
Removing an old roof makes a lot of debris and waste material. You can shovel the old shingles and nails onto the ground to be picked up later, or use a rental waste container or debris box that can be placed under an eave to allow the waste to slide right into the dumpster or large truck.
You can even make a plywood shaft to corral the debris into the dumpster.
Your local roofer will tear off your old roof and remove the waste if you don’t feel confident or have the time to do the job yourself.
Working Safely on your Roof

When doing minor repairs or inspecting your roof for damage, being safe is a priority for you and your local roofer. Slips and falls from rooftops account for hundreds of injuries and many deaths each year.
Personal gear should include boots with good traction, gloves and safety glasses. Some roofing companies provide safety harnesses also for their roofers.
A high quality aluminum or fiberglass extension ladder should be sturdy enough not to bend or shake when you are standing on it. When you raise the ladder to the roof, adjust it so it extends the edge of the roof by approximately 3 feet. When the ladder is positioned where you want it, use stakes and blocking at the base to keep it level and stationary. You can also stabilize a ladder by tying a rope around the ladder and through screw eyes attached to the fascia.
You can rent scaffolding at some home improvement stores
If you are going to be on your roof for an extended period, you may want to work on scaffolding to avoid the up and down and moving of a ladder. The scaffolding should be set on solid ground and leveled with blocks.
If you or your roofer will be working on a very steep roof, roof jacks will give you a small sturdy ledge to stand on. Nail 2 jacks securely into the rafter and then put a board across the 2 jacks. You can place these in several spots on the roof. Be careful when removing them that you don’t do any damage to the roof.
Insulating Ceilings that are Part of your Roof

Commonly ceilings that are also roofs are exposed beams, cathedral ceilings and tongue and groove sheathing that is visible from inside the house. These types of roofs do not have attic areas and commonly lose heat through exposed beams and attractive roof boards.
If you like your decorative ceiling you will need to install the insulation on top of the roof. Have your local roofer tear off the existing roofing material and install a vapor barrier and rigid insulation panels over the roof and sheathing. Nail ½ inch plywood over the insulation and re-roof.
Cathedral ceilings have straight edges that go up to the rafters. The sides slope equally and usually meet in the middle of the room. The ceiling has the same pitch as the outside roof. The roof rafters are usually tongue and groove boards and can be seen from inside the building. Or the inside is finished with sheetrock or plaster and painted. The best way to insulate cathedral ceilings is to create an air tight roof system.
Ventilation and moisture control issues for cathedral ceilings
The traditional moisture control method is installing insulation on the bottom of the cavity and the top area is left for ventilation. A newer method is while building and insulting the cathedral ceiling, insure that very little moisture enters the cavity to begin with, by building the interior tight through caulking and sealing.
Shingling Over an Existing Roof
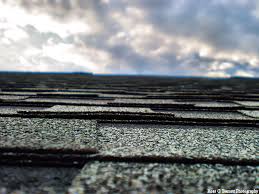
If you have only one layer of asphalt shingles on your roof you may be able to re-roof over your existing one. Be aware that some shingles installed over an old roof won’t last as long. If there are no leaks and your old roof is in good condition with just one layer of shingles it can be cost effective to put a new layer of shingles over the existing ones and avoid a tear off.
While it is similar to a regular roof job, the starter shingles are different in that they will need to have the top edge trimmed off of the roofing material. Nail the starter shingles along the entire bottom edge of the roof. The starter shingles will be covered with full size shingles and butt successive courses against the bottom of the following courses. The rest of the shingles can be applied in the regular installation process.
Change out old flashing and ridge caps
Apply new flashing where missing or damaged. Old hip and ridge caps will need to be removed and repaired with new shingles. Make sure the nails are long enough to go both layers of shingles and into the roof deck by ¾ inch.
It is always better to tear off old shingles and install a new roof that way you can see any damage to the sheathing underneath. Most building codes allow 2 layers of shingles, any more than that and it becomes a weight issue. You can ask your local roofer what the codes in your area allow.
Sealing Valleys on a Roof
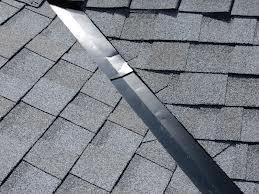
Valleys are where 2 angles of a roof meet creating a V-shape. When you discover a leak coming from your valley there are a few ways you can make the roof repairs.
Closed valleys are where the shingles butt together on top of the metal flashing. To repair leaks in this type of valley start at the bottom and slip a piece of flashing in the shape of a diamond under the butted up shingles. Overlap the pieces of flashing at least 2 inches. Nail each shingle and cover the head with roofing cement.
Metal flashing allow water to flow down the valley
Open valleys have the flashing exposed and the shingles end at the flashing edges. To seal make sure there is no debris in the valley. Check that the roofing material is cut in a straight smooth line on each side. The distance between the shingles should widen from the ridge to the eave at 1/8 inch per foot of valley. Lift each shingle and use roofing cement to coat the area that lies on the valley. Use a cartridge gun to run a bead of roofing cement down the valley next to the shingles.
If you need to patch a valley flashing cut a piece of sheet metal the same gauge as the original flashing. Cut a patch larger than the damaged area and wide enough to slide under the shingles. Apply a bead of roofing cement around the outer edge of the patch slide the patch under the shingles on one side and then the other. Put more roofing cement on the top and bottom of the patch where it lays over the original valley piece. Smooth the cement so water can flow uninterrupted down the valley.
You can also check online for video tutorials on how to repair your flashing. As always be careful if you go up on your roof to do any repairs yourself. If you are in doubt, hire your local roofer to make the repairs for you.
Roofers Offers Advice For Homeowners
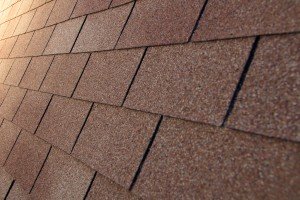 Your home is your greatest investment and the roof is the most important entity that protects it. For many people, roof repair and maintenance is a back burner issue. Professional roofers are hoping to spread the word to homeowners about the importance of seasonal inspections.
Seasons Are Reasons
With each change in seasons comes new threats to the integrity of your roof, especially if you already have some minor signs of damage. Fall brings the dropping of the leaves and temperatures. As things cool down and trees begin to shed their plant life, roofs become more susceptible to debris and damage. The best way to prepare your home for the fall and winter seasons is through a professional roof inspection.
During your inspection, the roofer will look for any signs of damage, debris or pest problems, and signs of imminent wear and tear. The average cost of a routine roof inspection is around $200. This expense is fraction of the cost for replacing a damaged roof. Your investment into routine roof inspections can save you thousands of dollars down the line. Further, having a professional inspection report can help win your case during an insurance claim.
Roof Tips For Homebuyers
 If you are thinking about buying a home one area of inspection you do not want to bypass is the roof. Even though your home inspector will assess the roof, having a local roofer do their own inspection could save you money and hassle down the line.
Don’t Cut Corners
The price for a roof inspection is hands down cheaper than the cost of roof replacement. If you are looking at a home to purchase be sure you hire a professional roofer to inspect the home before you put in an offer. Here is why:
- A roofer can identify areas of potential risk more so than a general home inspector. It isn’t just about obvious signs of damage, but also the potential for maintenance in the long run. Remember that the life of the roof is generally between 10 and 20 years, but any roof that has suffered prior damage or been poorly repaired could reduce the life of the roof.
- A roofer can give you their honest opinion as to the quality and integrity of the roof, whereas a general inspector must only report the facts. The roofer you choose to perform the inspection will not only report the facts, but provide you with their expertise in terms of roofing codes and quality of the materials used.
- A roofer is also trained to identify common roof problems associated with particular neighborhoods or regions. For instance, some homes are more likely to suffer challenges with severe weather; which could ultimately affect the durability of the roof. A professional inspection could reveal roof materials unsuitable for the particular area you are looking to purchase.
Tips To Prepare For Roof Repair
 If you are in need of roof repair work you probably know you can expect at least one days worth of loud noise and a full house of people. However, there is much more to know about the roof repair process that can better prepare you for the work to come.
Simple Solutions
Worried about who to choose? Finding the right roof contractor for the job isn’t as easy as you think. Always obtain multiple bids, ask for references and proof of liability insurance. Never choose a company who is not licensed or insured, sub-contracts the labor without a supervisor on site or that cannot provide you with people to back up their reputation.
Wondering about roof products? There are many roof materials you can choose from for your new roof. Do your research in advance and find out which material is best for your climate, style of house and budget. Reviewing your options before signing on with a roofing company can save you time and money.
What about the actual work? The day of your new roof installation can be a hectic one. Not only will there be lots of noise and commotion, it isn’t uncommon to find trash or debris left behind. The day before your work is scheduled to begin mow your lawn. Keeping the grass short prevents nails and other hazardous materials from being left behind. And speak with your contractor about their clean up policy, making sure that they take responsibility for haul away and clean up duty.
Your Roof Under The Summer Sun
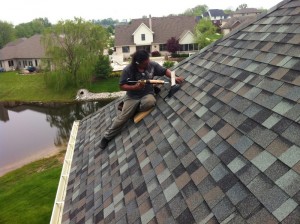 This time of year the temperatures being to rise, leaving homeowners faced with many challenges. Not only are people looking to stay cool and save money in the hot days ahead, but they are also hoping they can make it through the summer without the need for roof repair.
Preparing For The Elements
Hot temperatures and the sun’s rays are two elements that can cause a lot of damage to your roof materials, especially if they are already old or broken. Inadequate roof materials can easily lead to further costs of maintenance or the need for replacement when the temperatures heat up and the materials are exposed to damaging rays. Here is how to prepare your roof for the upcoming summer months.
- Do a visual inspection of your roof for signs of obvious damage or hire a roofer to perform a maintenance inspection.
- Repair or replace any damaged roof materials, ensure that flashing is in working order and seal any gaps in the materials.
- Consider upgrading your roof to a material that is more heat tolerant, such as ceramic or clay tiles.
- Ask a roof contractor about white roof coatings and how they can help lower your energy bill.
Is Your Roof Ready For Spring?
 One crucial aspect of homeownership is to ensure that the roof is properly maintained. Failing to have the roof routinely inspected for damage or putting off simple roof repair tasks can jeopardize the integrity of the roof. Further, many insurance companies will deny a damage claim if they feel the roof was improperly maintained. Now that the weather is changing, it is important to ensure your roof is ready for springtime challenges.
Changing Of The Seasons
Most people associate spring with warmer weather, sunshine and outdoor activities. However, in many parts of the country this also means a rainy season and threat of severe weather. Tornados, thunderstorms and prolonged periods of rain can all put an already damaged roof at risk for bigger problems. Follow these steps to ensure your roof is ready for the season:
- Take a closer look at your roof for any obvious signs of damage.
- Replace or repair missing, broken or bent roof materials.
- Have a roofer perform an inspection of the roof and provide you with a status report.
- You may even want to take pictures of your roof with a date and time stamp to document its undamaged condition.
- Keep a copy of the inspection report, or receipts of any repair work that is done to the home.
- File away these documents in case you need to file a damage claim in the coming months.


